

You will need:
- a clean jam jar
- emulsion paint (the type you use to paint walls-any colour you want)
- 2 small paintbrushes (one a little larger)
- an old top/jumper
- newspaper to lay down
- PVA glue
- glitter
- and any other decorations (I used washi tape and label from my label maker)


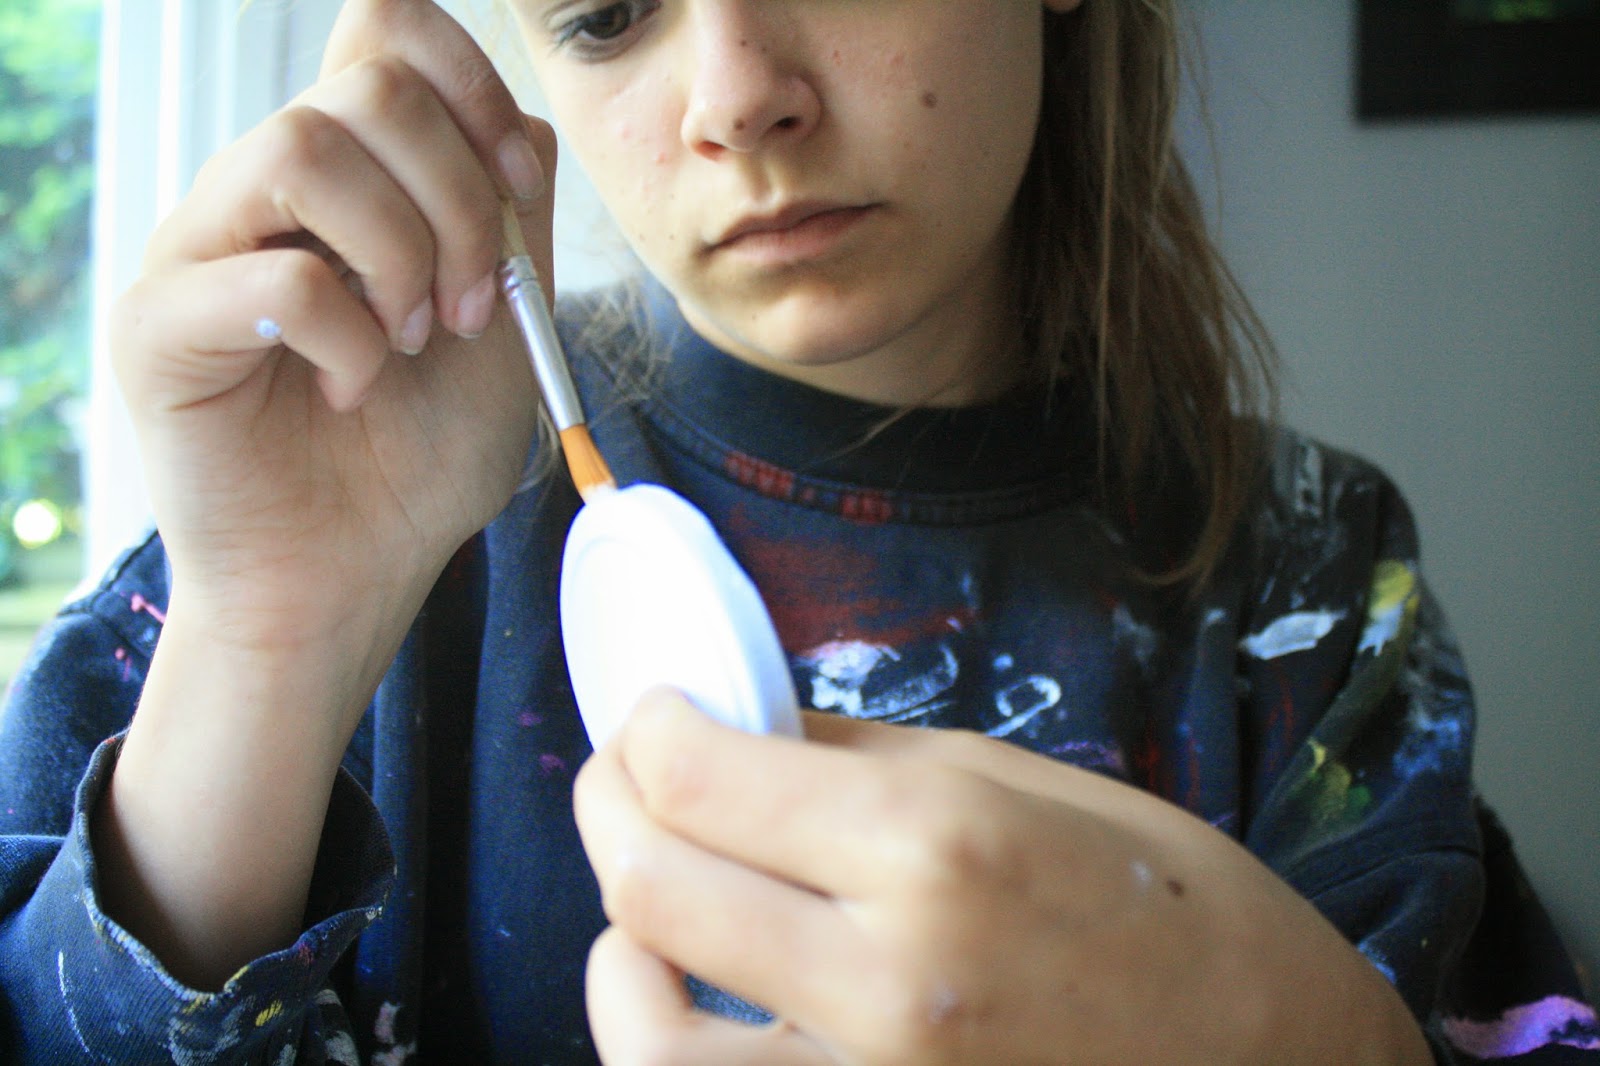
So begin by painting one even coat of paint over the lid. Don't worry if it looks streaky because you will be doing more coats anyway. This shouldnt take too long to dry but if you are impatient like me, using a hair dryer on a low setting can speed up the process.

Apply another coat when the previous one is dry-again don't worry if it looks too streaky but to minimise this, use less paint on the brush.

Now time to decorate!
 |
| I actually did two lids, the blue one (shown) was a test run to see how the painting went but I was too impatient to wait for the paint to dry so I switched onto this one which I actually prefer! |

Begin by using a small paintbrush to apply a generous amount of PVA around the rim of the lid. Be careful not to go over the edge otherwise the glitter will look uneven. Its important you get enough glue otherwise you end up with patchy glitter however this can be sorted out later.
 |
| I wish it was acceptable to wear my painting jumper outside-it is probs one of my fave jumpers |

Sprinkle a lot of glitter (lol I only just realised) (you need more than you think) onto clean newspaper.

And roll the lid through the glitter, back and forth until it picks up enough. You can also add glue then shake the glitter over so just which ever works best for you.


If you have any patches (I had tonnes) just take your paintbrush and dab a bit more glue on then shake the glitter over. If it goes over the edges just use your finger to brush it off and neaten the edges or when its all dry, you can blow it with the hairdryer which gets some of the unwanted glitter off.

TA-DAA!

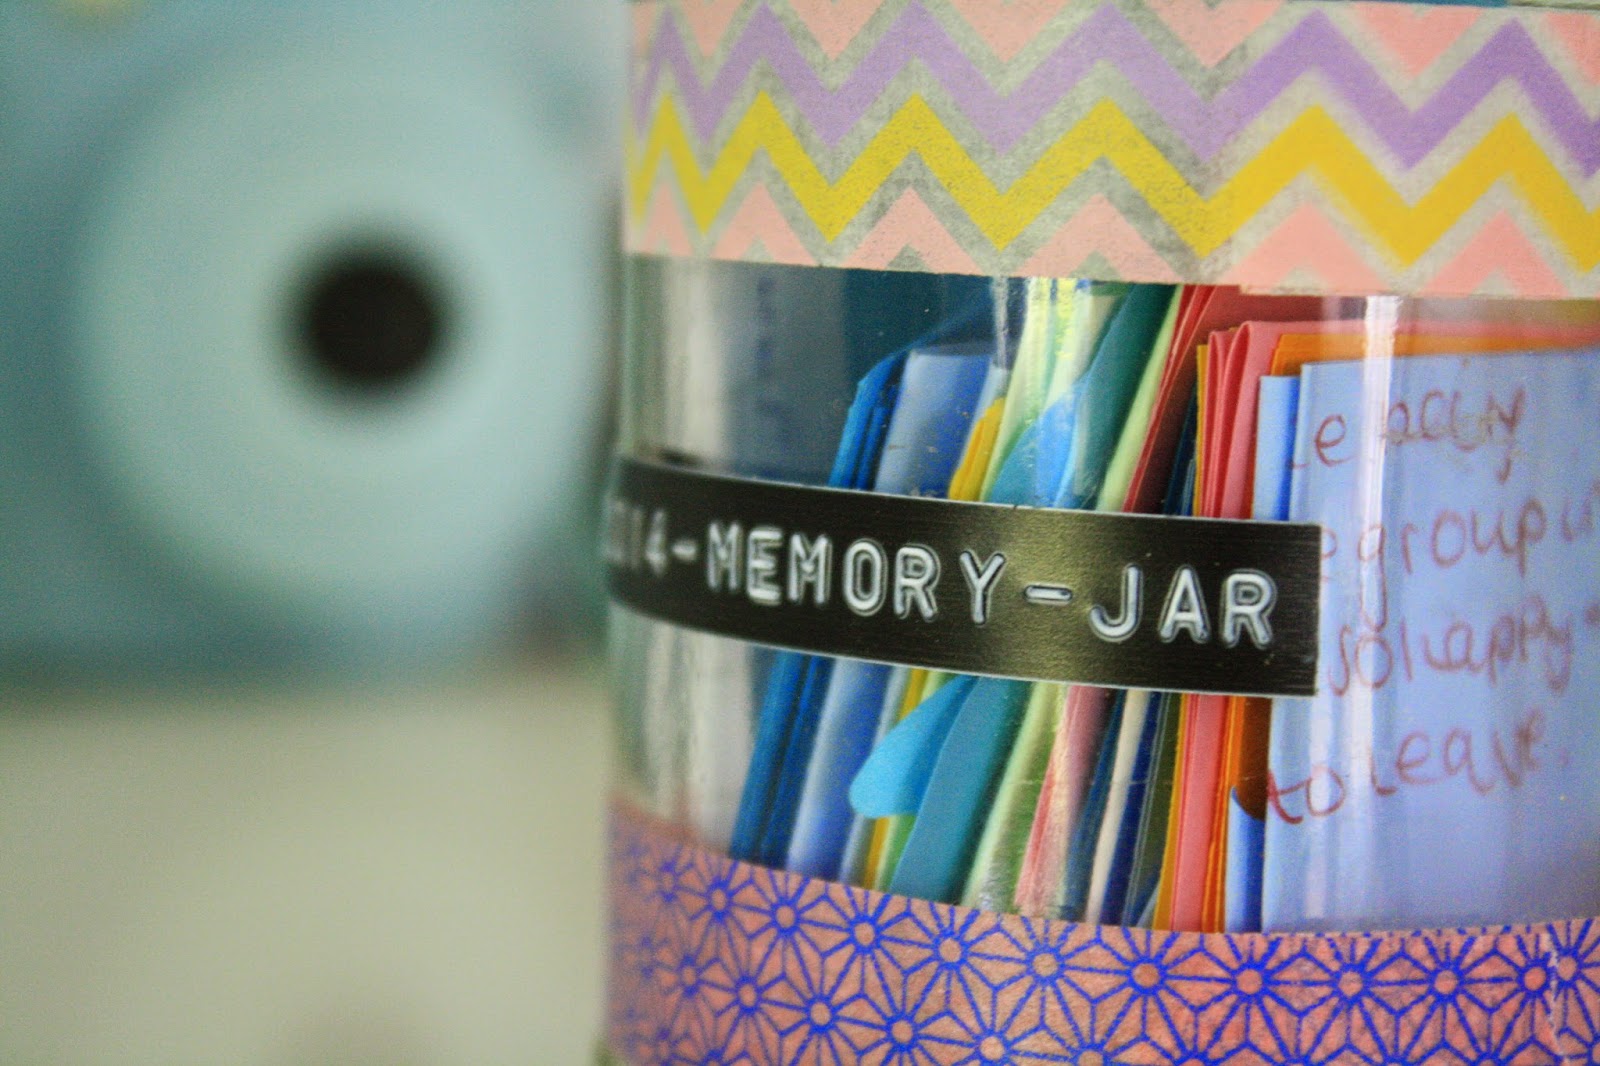
I used two washi tapes to decorate the glass-Washi tape is patterned paper craft tape that comes in some gorg patterns-I use it all the time!


Washi-taping done!


I used my incredibly retro label maker to make a label (obvs) for the jar. I used mine to store all my 2014 memories. These label makers are pretty darn cool-I swear they are like £5 or £6 on Amazon (the tape is almost the same price though...) but I love using mine.

And this is the complete thing!

I hope you enjoyed this little tutorial-I think these jars are so cute and would make adorable little gifts or decorations for your room.
I am laden with cold and an extortionate amount to do (Biology homework, Textiles course work, Blog posts etc I genuinely need a holiday already) and cannot stop sneezing. Its driving me crazy and is resulting in constant tea drinking, boiling baths and many a Sherlock episode-hey I guess its not all bad.
Have a lovely week,
Katie x
Twitter - Bloglovin - Instagram
Currents: Listening: The 1975 Settle Down--Chocolate// Reading: Still The Help-Kathryn Stockett//Loving: My new flanel shirt// Lusting: Chai Latte


